New Content, New Site — Join Me at The Allergy-Free Project!

A huge thank you to all of my followers who have joined my journey of allergy-free eating over the last couple of years. I have learned so much through this process, and I look forward to continuing to share my journey of allergy-free eating and optimal health while also adding a lot of fun new categories. As a result of this change, I felt that May We Be Allergy-Free was ready for a makeover. While my focus will continue to be on food, I will also be adding additional content that utilizes all of the research I’ve done on healthy skin, hair, body, and makeup products, minimalism and capsule wardrobes, safe do it yourself products for the home, and one of my most requested topics — overnight headband curls!

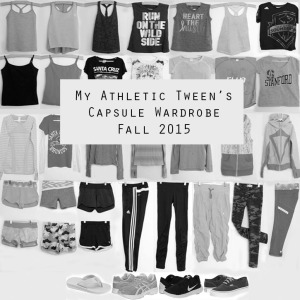
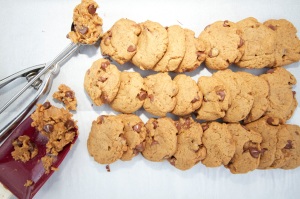
Soon you will see recipes for homemade kombucha an elderberry syrup, my top five allergy-free recipes, a lunchbox challenge, and an unprocessed snack food challenge! Since so many of my posts will be related to health and projects, my new website is The Allergy-Free Project. All of the same great content and recipes from May We Be Allergy-Free has already been transferred over, and there are two brand new posts already waiting for you! IMG_7532_webSee my latest recipe for The Best Vegan Chocolate Chip Cookies in the World, and be sure to check out my first venture into minimalism with My Athletic Tween’s Capsule Wardrobe for the new school year! Sign up for email updates on the new site, and find me on Instagram @theallergyfreeproject or on Facebook!

capsulewardrobescreenshotad_b&w

Many thanks for your support, and I look forward to seeing you at The Allergy-Free Project!

Much love,

Anne-Michelle

Steamed Vegetable Potstickers (Lunar New Year)

In this week’s cooking class, we made vegetable potstickers to celebrate Lunar New Year! If you’re gluten-free, then I highly suggest referring to my previous post about homemade gluten-free vegan wonton wrappers. They were my favorite wrapper so far — way better than store bought. Since we do not have a gluten allergy this year, I was able to find egg-free and dairy-free wrappers at Lion, our local Asian Supermarket. We used a very simple vegetable filling, and when the students asked for the recipe, I told them to make it up as they go! All they needed was the wrappers.

Steamed Vegetable Potstickers

Ingredients

For the filling

  • potsticker, wonton, or dumpling wrappers
  • shredded veggies of choice — we used cabbage and carrots from this week’s CSA box, but you can also use scallions, mushrooms, sprouts, or any local in-season veggies!

For the dipping sauce

  • 1/2 cup organic soy sauce, coconut aminos, or liquid aminos
  • 1/4 cup rice vinegar
  • 2 tsp toasted sesame oil
  • 1 tsp ground ginger
  • 1 tsp coconut sugar

Directions

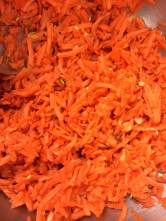
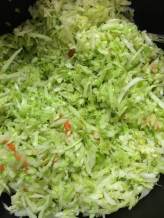
1. Shred veggies in your hand shredder or pulse in your food processor until small pieces are cut. Set aside.

potstickers4

Shredded Carrots

potstickers3

Shredded Cabbage

2. Combine all the dipping sauce ingredients and mix well.

3. Place a wrapper on a flat surface, and fill the center with 1-2 tsp of shredded veggies. Top the veggies with 1 tsp of dipping sauce.

4. Dip your finger in water, and rub around the edge of the wrapper to help it seal.

potstickers1

Adding the filling to the wrapper.

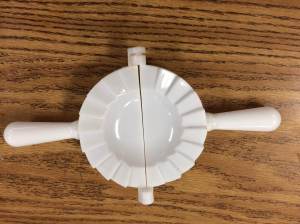
5. Seal the wrapper by folding it in half and pressing down on the edges with the sharp edges of a fork on both sides. Or, you can purchase an inexpensive tool from Daiso, the Japanese Dollar Store, and use it to press the edges of your wrapper together tightly.

potstickers6

Wrapper folder from Daiso.

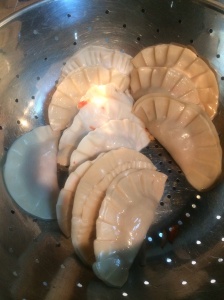
6. Place in a steamer basket, and steam for 5-7 minutes, depending on how full the steamer basket is. I use a regular pot and place a colander on top, then use a plate over the colander to keep the steam inside. Tip: lightly brush a layer of oil on the bottom and sides of the colander/steamer basket and between and in between each potsticker to prevent them from sticking together.

image

Raw potstickers in the steamer basket with a light layer of oil in between to prevent sticking.

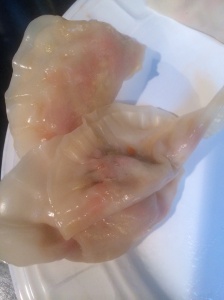
7. When potstickers are translucent and the edges are cooked throughout, remove them from the steamer. Briefly allow to cool, dip in dipping sauce, and enjoy!

image

Steamed potstickers are ready when translucent and edges are cooked throughout.

Raw Snickerdoodle Donut Holes (paleo, vegan, gluten-free, egg-free, dairy-free, soy-free, peanut-free)

Over the summer, this recipe crossed my inbox, and I took the cutest video of my then-3-year-old helping me roll out the balls and add the topping. I made this recipe throughout the entire summer because the ingredients were pantry staples and it was so easy to throw together with my little kitchen helper.


Cinnamon Sugar Donut Holes aka Raw Snickerdoodle Donut Holes by Betty Rawker <– how cool is that name?!

Ingredients

  • 1 cup shredded unsweetened coconut
  • 1/3 cup almonds
  • 1 vanilla bean, scraped or 1/2 tsp vanilla extract or 1/2 tsp vanilla powder
  • 1 tsp cinnamon
  • pinch of sea salt
  • 4 medjool dates, pits removed
  • 2 T grade b maple syrup or raw local honey

Topping

  • 1 T coconut sugar
  • 1 tsp cinnamon
  • 1 T shredded unsweetened coconut

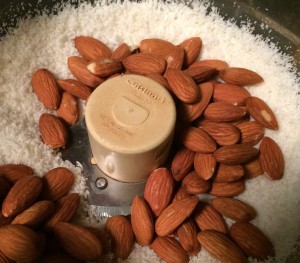
1. Add coconut to your food processor and run for 30 seconds to one minute to release the oils.

2. Add the whole almonds and process with the coconut until well ground and combined.

IMG_3631

Shredded coconut and whole almonds in the food processor.

3. Add the vanilla, cinnamon, and sea salt, and process until a fine consistency is reached.

4. Add dates. Process.

5. Add honey, Process.

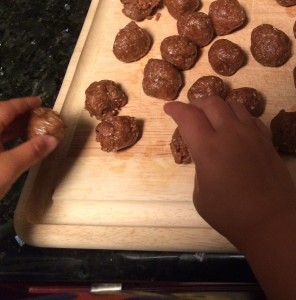
6. Pour the mixture onto a flat surface, and begin rolling into balls. I prefer to use my melon baller to make the process move more quickly.

IMG_3636

My 3-year old helper rolling out the snack balls to make them consistent and perfectly round!


7. Roll each ball in the separate topping until well coated.

IMG_3652

My 3-year old kitchen helper coating the snacks with the special topping

8. Eat immediately, refrigerate, or freeze.

Salad for Breakfast?! Red Pepper and Ginger Salad Dressing (vegan, raw, gluten-free, egg-free, dairy-free, soy-free, nut-free, peanut-free)

I don’t know about your kids, but my kids get tired of the same old breakfast. I admit that I buy and prepare the simplest things — oatmeal or cereal — because it’s so easy, it dirties the kitchen the least, and it takes no early preparation. My kids are very good eaters, but my 4-year old loves to keep me on my toes.

This morning, he asked for corn. Yep, just a big bowl of corn. Surprisingly, he wasn’t satisfied, so I threw together his favorite salad dressing since I happened to have all the ingredients on hand. Then I served up a little bowl of chopped lettuce with his salad dressing. He gobbled it up and wanted more. His second bowl was the same, and he wanted more. The third bowl I had run out of lettuce, so I gave him some chopped baby kale and dressing. He wanted a fourth bowl! This boy LOVES him some raw dressing! Without further ado, I am reposting this salad dressing with its own dedicated post that is a hit in our household, it makes a huge quantity that I am able to refrigerate for later use, and because I frequently search my own blog for my favorite recipes, and this is one of the regulars in my searches.

redpeppergingerdressing2

Tait’s third bowl of breakfast salad.

Red Pepper and Ginger Salad Dressing by Cookie & Kate
Ingredients
  • ½ cup olive oil
  • 1 red pepper, seeded and chopped into big pieces
  • 1 lime, juiced
  • 2 tablespoons raw local honey
  • ¾ inch piece of ginger or 1/4 tsp ground ginger
  • 2 tablespoons apple cider vinegar
  • 1 clove garlic
  • Optional: a dash of toasted sesame oil

Directions

Place all ingredients in the order listed above and process in a high speed blender until combined. Enjoy!

redpeppergingerdressing1

Tait’s tiny bowl of breakfast baby kale with his favorite salad dressing.


Frozen Non-Dairy Yogurt Breakfast Parfait Popsicles (vegan, dairy-free, gluten-free, egg-free, nut-free, peanut-free, soy-free)

I rarely ever buy non-dairy yogurt for my house because my kids eat all of it within minutes of bringing it home. However, when I found this recipe for frozen yogurt breakfast parfaits, I was thrilled to think that they’d last longer than a few minutes! I had to tweak the original recipe a bit to make sure they could still be made dairy-free and nut-free, but it could be done, and it was a success!

My main advice is to make them much smaller than the ones shown. The cups I used are approximately 8 oz, and I filled them 3/4 of the way full, but the serving was so large that they even made my adult-sized belly full, so they were definitely too big for my kids. But the fact that they couldn’t eat all of it in its frozen form compared to eating container after container of its refrigerated form made it worth it.

yogurtparfait2

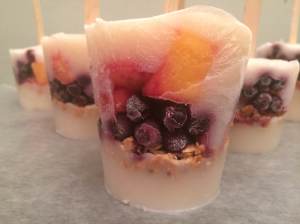
Frozen non-dairy yogurt breakfast parfaits

Non-Dairy Yogurt Breakfast Parfaits

Recipe adapted from Regan @ OnceAMonthMeals.com

  • 1 16-oz container non-dairy yogurt, vanilla*
  • 1 16-oz container non-dairy yogurt, plain*
  • 1 package gluten-free, nut-free, peanut-free granola
  • 1 package frozen fruit (I used blueberries and mangoes, but you can use mixed berries or strawberries, too! Fresh is always preferred during the summer months.)
  • 6 paper cups or frozen popsicle molds
  • 6 popsicle sticks

*I used So Delicious brand non-dairy coconut yogurt

Directions

1. Fill each paper cup or mold in the following order:

– 3 spoonfuls of vanilla yogurt

– a spoonful of granola

– a spoonful of first fresh or frozen fruit of choice

– a spoonful of second fresh or frozen fruit of choice

– 3 spoonfuls of plain yogurt

non-dairy vegan nut-free yogurt parfait

Layers of non-dairy vegan yogurt parfait. From right to left: (1) Layer 1: vanilla yogurt, (2) Layer 2: granola, (3) Layer 3: fresh or frozen fruit, (4) Layer 4: plain yogurt [not pictured}

2. Place paper cups or molds in the freezer for one hour.

3. Place popsicle sticks in the center of the frozen mixture, then allow to freeze overnight.

4. Remove from molds and wrap in wax paper. Place in ziplock storage bags and store in freezer until breakfast!

yogurtparfait1

Frozen non-dairy vegan yogurt breakfast parfait removed from paper cup mold.

Non-Dairy Cheesy Kale Chips (raw, vegan, gluten-free, dairy-free, egg-free, nut-free, peanut-free, soy-free)

My husband is out of town this week (snowboarding in Vancouver with the boys — tough life!), and you’d think that I’d be less efficient getting things done around the house. Unfortunately, it’s quite the opposite because I realize he’s not around to pick up my slack. Last night, I sat down with the kids at the dinner table, and we talked about what they wanted for breakfast and in their lunches the following day. They all decided on Vegan Overnight Oats for breakfast (their favorite!). My 4-year old wanted crackers for lunch, and I realized I didn’t have any on hand, but I did have a bunch of heads of kale and all the basic ingredients to make chips, so vegan cheesy kale chips it was!

Non-Dairy Cheesy Kale Chips

Ingredients

  • 2 bunches of kale (I prefer curly or red kale for kale chips because they hold up their texture and shape the best after being marinated and dehydrated, but any type of kale will do)
  • 1 bell pepper, coarsely chopped (I prefer red, orange, or yellow)
  • 2 tsp nutritional yeast
  • 1 1/2 tsp salt
  • 1/4 c tahini butter
  • 2 Tbsp unpasteurized miso paste

Optional: chipotle pepper, jalapeno, curry powder

Directions

1. Wash and remove the coarse stems from both bunches of kale, and tear leaves into bite-sized pieces. A quick trick: hold the bottom of the stem in one hand, and with the other hand slowly slide your hand up the stem. The leaves will slide right off.

kalechips1

Washed and cleaned kale

kalechips2

Easily remove the leaves by (1) holding the bottom of the stem with one hand,

kalechips3

and (2) slide the other hand up the stem as the leaves fall off.

2. Place all of the ingredients, except for the kale, in a high powered blender. Mix on high until well blended.

2. Pour the dressing on top of the kale, and use your hands to massage dressing into the kale leaves. If you enjoy the true taste of kale, I recommend mixing just until combined. If you are still getting used to the taste and texture of kale, then I recommend massaging the dressing into the kale for several minutes until the leaves start to break down and become more pliable.

kalechips5

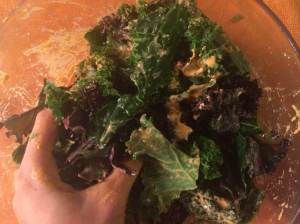
Nondairy cheesy dressing poured on top of the kale pieces

kalechips6

Gently massage the dressing into the kale with your hands.

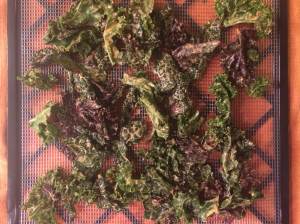
3. Evenly space the kale pieces on dehydrator sheets. The pieces will stick together after they’ve been dehydrated, so be sure to give them a lot of room. I used four dehydrator sheets for two bunches of kale.

kalechips7

Evenly spread out kale chips on a dehydrator sheet.

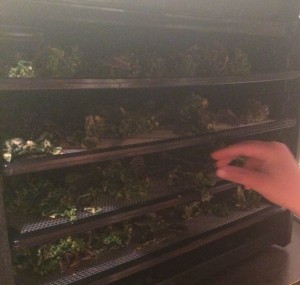
4. Dehydrate at 145 degrees for 1 hour, then reduce heat to 118 degrees and dehydrate for 6-8 hours or until crunchy.

kalechips10

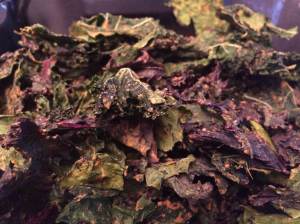
Crunchy and full nondairy vegan kale chips!

My kids prefer to eat their kale chips when they are still wet from the dressing, but they keep much better in their lunches when they are crunchy. Nothing makes me happier than when they sneak raw kale from the dehydrator when they think I’m not looking.

kalechips9

Sticky fingers stealing the raw cheesy kale chips!

What is your favorite kale chip recipe?

My Obsession with Branch Basics

Ever since I ventured down the path of allergy-free eating, homemade herbal syrups and supplements, home brewed kombucha and fermented products, nothing is too far fetched for me to make at home as long as it is healthier than the product offered in the store.

I am teaching a weekly enrichment in my daughter’s 4th grade class called Amazing Herbs, which is a make-and-take class based on all the powerful herbal concoctions available within the palm of our hands. One of the topics I wanted to address was homemade cleaners. I am appalled that companies are not required to list their ingredients on their label, so I usually refer to the Environmental Working Group’s Guide to Healthy Cleaning to spot the safest, most transparent products on the market. What bothers me the most is that the exact same cleaning product can have a 1 safety rating in one scent, but if they also make the product in a different scent, the safety rating may boost up to a 6 or 7! Same goes for the same company — the safety rating for one product does not mean another of their similar products is also safe! So frustrating, both as a parent and as a consumer.

But what really pushed me over the edge is green-promoting Melaleuca, which boasts being safer for the environment and better for your home. The reality is that I have not been able to find a list of their ingredients for any of their products, nor has the Enviornmental Working Group rated them. I sadly have  bunch of this product in my closet because I thought it was the safest on the market only to find out they are one of the least transparent companies.

I’ve also heard that a good rule of thumb to purchasing cleaning products is based on ingestion — if you must call poison control immediately upon accidental ingestion, it must be an incredibly toxic product. If the label instead suggests drinking water in the event of accidental ingestion, then it must be relatively safe.

So, I began resorting to homemade cleaning products based on good old vinegar, Dr. Bronner’s Magic Soaps, and essential oils. And just as I was about to buy a huge batch to start making my own, I heard about Branch Basics from a health blog that I subscribe to. There was a sale on a starter kit, so I decided to take stab at it and buy a gallon of their concentrated liquid plus three of the refill bottles.

Low and behold, this concentrate is AMAZING! It has taken the mud stains out of my daughter’s white soccer socks, urine stains out of my child’s mattress, and grime off of my kitchen counters. I haven’t used it for my laundry yet, but that is definitely next. The crazy part is that this exact same product is safe enough to wash my hands, face, and even my produce! Though it’s not recommended to ingest, it is perfectly safe to do so!

I’m so excited that only ONE product does all of these things, it just needs different concentrations to do so. For super tough stains, I use the full concentrate. For foamy face and soap wash, I use a 1:5 soap to water ratio. When you purchase a starter kit, it tells you exactly what to do and how much to use! I add my own essential oils, so that each bottle smells differently based on what I want to use it for. I use peppermint for the foamy soap, orange for the all purpose cleaner, etc.

Want to know the ingredients? “Coconut oil, minerals, enzymes, and fatty acids come from edible, leafy green and seed-bearing plants. They also use food-grade alcohol as a manufacturing catalyst, which is completely evaporated out before bottling.”

I am not an affiliate, nor am I receiving any promotional material for this post. I am just so excited that I’ve found an all-in-one cleaner that actually works! And right now everything in their store in 25% off site wide through Dec 31, 2014. Check out their products and let me know if you try it or not!

This is not to say that making your own cleaning products is not completely sufficient. I love this product because it’s affordable, plant-based, and it’s one less thing that I have to make at home because it’s equally efficient as buying it from the source.

Now if only they made deodorant…

xoxo
Chocolate Dipped Rosemary Shortbread Cookies (gluten-free, dairy-free, egg-free, soy-free, peanut-free, nut-free, vegan)

I am very fond of my neighborhood rosemary bushes. I have an ongoing relationship with my neighbors, and they give me a delighted nod every time they see me picking their rosemary without asking. I don’t know if it’s the rosemary that I love or if it’s the sense of community that I feel by eating local organic herbs harvested among friends.

rosemarycookies1

Holiday Cookies – Chocolate Dipped Rosemary Shortbread

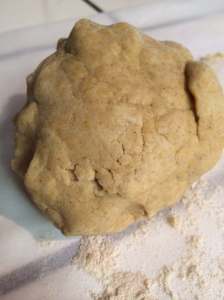
A recipe for rosemary cookies came through my inbox recently, and after careful review, I decided to make it gluten free! I used the same principles I applied when I made homemade baked goldfish crackers gluten free by replacing the all purpose flour with three different gluten flours — two medium weight and one lightweight. The types I chose weren’t too scientific, they were basically whatever I had on hand.
I was actually surprised by how challenging this dough was to work with. When I make these again, I will make them a day in advance and wait at least an hour in between each rolling and cutting session. The cookies that were the sturdiest and had the best shape were the ones that were the hardest when using the cookie cutter and transferring them to the baking sheet.

Easily, these cookies were the hit of the party. It was wonderful eating seasonal herbs right from our neighborhood, but they were so simple and delicious that everyone raved about them. And to think, I only brought them so my allergy-ridden son would have a dessert option. That’s the stuff that makes me smile!

Sarah’s Chocolate Dipped Rosemary Shortbread Cookies
Recipe adapted from Sarah McMinn’s guest post on Keepin’ It Kind

rosemarycookies2

Baking sheet lined with chocolate dipped rosemary cookies

Shortbread Ingredients

  • 2/3 c oat flour
  • 2/3 c brown rice flour
  • 2/3 tapioca flour
  • 1 tablespoon fresh rosemary, minced
  • 1/2 teaspoon salt
  • 1 cup Earth Balance sticks
  • 1/2 cup organic powdered sugar
  • 1 teaspoon vanilla
Chocolate Dipping Ingredients
  • 6 ounces Enjoy Chocolate Chips
  • fresh rosemary sprigs

Tools

  • rolling pin
  • parchment paper
  • baking sheets

Instructions

  1. Preheat the oven to 325 degrees.
  2. Combine the flour, salt and rosemary in a food processor and pulse a few times until well blended and the rosemary is evenly dispersed.
  3. In a stand up mixer combine butter and powdered sugar. Beat for a solid five minutes, scraping down the sides as needed. Add vanilla and flour mixture and combine just until the dough comes together.
  4. Turn dough onto a floured piece of parchment paper. Place another piece of parchment paper on top. Roll out the dough, using the parchment paper between the dough and rolling pin, to keep it from sticking. Place the flattened dough in the refrigerator for one hour.
  5. Remove the dough from the refrigerator, and use a cookie cutter in the shape of your chocie to cut the cookies and place them on baking sheets lined with parchment paper.
  6. Return to cookie cut outs to the refrigerator for 20-30 more minutes.
  7. Bake for 16-20 minutes or until the edges begin to turn golden brown. Remove from oven and let cool completely before handling.
  8. For optional chocolate drizzle, melt chocolate in a double boiler or microwave in 30 second increments until melted. Use a pastry brush to evenly distribute the chocolate along the side of the cookie you choose. Add two small sprigs of rosemary for decor.
rosemarycookies3

A couple tiny sprigs of rosemary added for decor!

Pumpkin Bread Muffins (gluten-free, egg-free, dairy-free, soy-free, nut-free, peanut-free, vegan)

If you are looking for a muffin that you can’t possible screw up, this is the one for you. Rather than a muffin, it’s more of a banana-bread type consistency that I put in muffin cups. It cooks at a lower temperature and for a longer period of time than usual, just like a quick bread. It’s dense and hearty for breakfast or snacks, but sweet enough for dessert. You can even bake them in donut baking tray, and the kids will be thrilled to have donuts for lunch!

I have made this recipe six times now, and I have made it differently every single time. I have doubled it (WOW that made a ton!!), halved it, forgotten one of the three flours and only used two, forgot the flax egg, used honey one time then sugar another time, used half honey half sugar, used only pumpkin and used a combination of pumpkin and delicata squash, made mini muffins and full size muffins, and used a combination of oil and grass fed ghee. The only constant is that I’ve always used homemade pumpkin or squash cooked in my crock pot. I’ve made this by myself, with my kids, and with four sets of kids in the 2nd and 3rd grade. Every time, the results are magic. Without further ado, here is the recipe!

wpid-20141204012407.jpg

Both recipes were made with brown rice flour, freshly ground oat flour, and tapioca flour. On the left: recipe was halved and made with organic cane sugar and delicata squash puree / On the right: full recipe was made with honey and pumpkin puree


Pumpkin Bread Muffins

Recipe Adapted from Katie Kimball of Kitchen Stewardship

Ingredients

  • 2 flax eggs (each egg = 1 T. flax seed meal + 3 T. warm water)
  • ⅔ c. brown rice flour*
  • ½ c. buckwheat flour*
  • ½ c. arrowroot starch**
  • ½ tsp. cinnamon
  • ½ tsp. nutmeg
  • ½ tsp. cloves
  • ¼ tsp. baking powder
  • 1 tsp. baking soda
  • ¾ tsp. salt
  • ½ c. honey OR ¾ c. sugar
  • ½ c. melted coconut oil or Earth Balance vegan buttery spread
  • 1¼ c. pumpkin puree or any other winter squash (canned or homemade)
  • If needed: ¼ c. cold water

*You can substitute any other medium weight flour, such as oat flour (grind your own oats in your high speed blender if you don’t have them on hand!), buckwheat flour, sorghum flour, or teff flour. Try to use two different flours for each of the medium weight flours. But, this recipe is magic, so it may work just fine with only one type!

**You can substitute any other light weight flour, such as tapioca starch, potato starch, or even organic corn starch.

Directions

  1. Preheat the oven to 325 degrees.
  2. Make your flax egg(s). Warm your measured water in the microwave for 30 seconds. Remove, and add flax seed meal to the warm water. Stir and let sit for 5+ minutes, or until it has an egg-like consistency. Set aside.
  3. Add all of your dry ingredients to a bowl. Stir.
  4. Add the wet ingredients to the top of the dry ingredients in the same bowl.
  5. Stir as few times as possible, just until dry and wet ingredients are combined. The more you stir, the tougher your muffin bread will be.

    wpid-20141204012315.jpg

    Oops – My 2nd and 3rd graders over-mixed their batch!

  6. Add up to 1/4 c. of cold water to the mixture if it needs more movement.
  7. Line muffin tins with muffin liners and pour the batter into each liner until it is 3/4 full.
  8. For regular sized muffins, bake for 42-44 minutes; for mini muffins, bake for 20-22 minutes.

    wpid-20141204011642.jpg

    Yummy finished mini muffins and mini donuts!

Cinnamon Bun Smoothie (gluten-free, egg-free, dairy-free, soy-free, nut-free, vegan)

I couldn’t possible be more excited about my favorite time of year. Thanksgiving with family, our annual tradition of cutting down a Christmas tree the day after Thanksgiving, putting up Christmas decorations, listening to Disney holiday music, and making festive meals, desserts, and drinks tied to the fall and winter seasons. On Friday night, I watched my three kids dancing around the tree, adding all of our ornaments to the only the bottom two feet while I brewed some homemade apple cider, and I literally sat down on the couch for a moment and thought nothing could possible beat this. (Actually, it could have been slightly better if it wasn’t Disney music that was blasting, but aside from that, it really was a spectacular moment.)

The following morning, I made one of my favorite festive morning smoothies that reminds me of the holidays: a creamy and divine smoothie that tastes and smells of frothy cinnamon.

Cinnamon Bun Smoothie (gluten-free, egg-free, dairy-free, soy-free,nut-free, peanut-free, vegan) Recipe adapted from Kim McDevitt of Vega One

Ingredients

  • 1 cup unsweetened nondairy milk
  • 1 frozen banana OR 1 room temperature banana with four ice cubes if you prefer your smoothie cold (Be sure to peel the banana before you freeze it!)
  • 1 Tbsp sunflower seed butter
  • 2 dates
  • ¼ cup gluten free rolled oats
  • 1 scoop vanilla protein powder
  • 1 tsp cinnamon
  • 1 tsp vanilla extract
  • 1 tsp maca powder

Directions

  1. Remove peel from banana and place in freezer. You can skip this step if you’re in a rush to make your shake and you don’t have a frozen banana on hand by adding a room temperature banana and 4 ice cubes.
  2. Add the nondairy milk to the blender, followed by the banana, then add the remaining ingredients. I prefer to add all of my dry ingredients at the end, so they don’t stick to the sides of the blender when I turn it on.

    wpid-20141203044129.jpg

    Adding the dry ingredients to the smoothie to keep it from sticking to the sides of the blender.

  3. Slowly turn on the blender, and once all of the ingredients are incorporated, turn the blender up to high until combined.

    wpid-20141203041031.jpg

    Creamy Cinnamon Bun Smootie (gluten-free, vegan)

  4. Enjoy!

Bulletproof Coffee

Has anyone else heard of this new meal replacement? Before you try it, READ THIS! I’d heard about it previously from a nutritionist that a cup of coffee mixed with coconut oil and grass-fed butter (also known as Bulletproof Coffee) would be a great meal replacement because of the calories and fat and a myriad of other performance-related benefits. I assumed this to be true, but about a week later I stumbled across this article in GT Weekly entitled Fat Chance: Is the butter-in-coffee fad really good for you? It turns out that it is IF AND ONLY IF you’re on a strict paleo diet. And how many people can say that they really are? Per the article:

“He’s not giving you the full story physiologically, and what he’s leaving out is really important,” says Dr. Dawn Motyka of KUSP’s Ask Dr. Dawn. For instance: “You absolutely cannot have any starch or sugar with this.” And no matter how tempting it may be, Asprey really should warn his followers not to add sugar. “That would be horrible, because then that fat is just going to circulate in your arteries; you can’t burn it.”

The trend is really only OK for people who are on a strict paleo diet—for more than just that day.

“If you’re eating paleo, after a couple of weeks your body adjusts and you produce different enzymes, and your body starts to burn fat, and when you do that that’s great, but the adaptation relies on you not eating sugars,” says Motyka.

Another article I’m digging is Bulletproof Coffee Pros and Cons, which states:

I would stay away from any radical diet plans and suggestions. The real Bulletproof body you are looking for, is built in the gym and supplied with nutrition from long term planned eating habits, such as the Mediterranean Diet, for example.

Obviously, you can find literature to support whatever view you have at any given time. However, I agree with the last quote, and just eat real food! Plants, lots and lots of plants. All colors of plants, different types of plants — a rainbow of them. I don’t know anyone who ever got sick from eating too many fruits and vegetables.

Don’t get me wrong, one of my favorite indulgences is grabbing a gourmet coffee drink and a pastry. But the next time you consider going for a cup of Bulletproof, be sure to consider it only if you’re on a strict paleo diet.

If you don’t know what a paleo diet is, then you might want to stick with a regular cup of Joe 🙂

Tandoori Roasted (or BBQ) Vegetables

Last night’s dinner yielded a fun and delicious spin on roasted veggies for dinner. Not that I don’t love roasted veggies with fresh herbs and olive oil, but why don’t I ever think about marinating the veggies first? This recipe calls for a yogurt-based marinade (I used coconut milk yogurt to keep it vegan) with Indian spices, then smothered all over blanched veggies. Yes, blanched veggies! Why didn’t I ever think of doing that to get the broccoli and cauliflower more evenly cooked? Brilliant.

tandooriveggies5

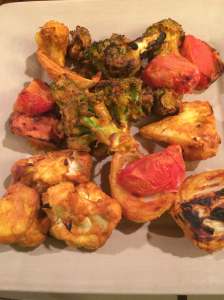
Tandoori Roasted (or BBQ) Vegetables

Tandoori Roasted Vegetable Skewers adapted from Veggie Belly

Note: I tripled the ingredients from the original recipe to feed our family of five since the original recipe only fed two. See the link above for smaller portions.

Ingredients

  • 2 heads of broccoli, cut into large florets
  • 1 head of cauliflower, cut into large florets
  • 4 tomatoes, quartered
  • 1 onion, quartered

Marinade Ingredients

  • 9 Tbsp chickpea or garbanzo flour
  • 1 1/2 cups yogurt (I used two 6 oz containers of So Delicious brand plain coconut yogurt)
  • 6 Tbsp lemon juice
  • 6 Tbsp vegetable oil
  • 3 tsp garlic paste (I used garlic powder)
  • 3 tsp ginger paste (I used ginger powder)
  • 3 tsp garam masala (I used curry powder)
  • 3 tsp paprika
  • 1 1/2 tsp turmeric powder
  • 3 tsp coriander powder
  • salt, to taste

Directions

1. Bring a large pot of water to boil. In the meantime, chop the veggies.

2. Once the water is boiling, add half of the cauliflower and broccoli florets to the boiling water. After 30 seconds, remove the florets and let them cool. Run cold water over them, if needed, to prevent from further cooking. Repeat with the other half of the florets.

tandooriveggies1

Blanching the cauliflower and broccoli florets

3. Combine the marinade ingredients into a medium sized bowl, and mix well.

4. Add all of the chopped raw veggies (onions, tomatoes) and the blanched veggies (cauliflower, broccoli) to a large bowl. Cover the veggies with the marinade and mix until all of the veggies are well coated. Let sit in the refrigerator for 30 minutes.

tandooriveggies2

Adding the marinade to the raw and blanched vegetables.

5. In the meantime, turn on the oven to Hi Broil, and line a baking sheet with foil, spray with non-stick cooking spray.

6. Once the veggies have marinated, place the veggies on the baking sheet with a bit of space in between each row for easy turning during cooking. (In the alternate, you can put them on skewers and BBQ the veggies.) If you have any leftover marinade, save it to slather on the cooked veggies or use it as a dipping sauce for lunches.

tandooriveggies3

Marinated vegetables on a lined baking sheet before they go in the oven.

7. Place the baking sheet on the second to top rack, and let cook for 15 minutes or until the veggies begin to blacken.

tandooriveggies4

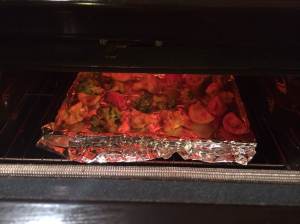
Broiling the vegetables on Hi.

8. Turn the veggies over using a fork or prongs to brown the other side for approximately 5 minutes or until the veggies blacken.

9. Gently lift each veggie off the plate and place in one layer on a serving platter.

tandooriveggies5

Dinnertime! Tandoori Roasted/Broiled Vegetables

Quick Tip: Chop the veggies in the morning or the night before, and make the marinade in advance! It will save you a ton of time in the kitchen, and you’ll only have to broil or BBQ your veggies for dinner!

My favorite part about this dish is that my youngest child thought the cauliflower was chicken, and about an hour after dinner, I found my daughter at the kitchen table eating the leftovers because she loved the veggies that much. Definitely a keeper.

tandooriveggies6

Round 2!

Frozen Grapes on a Toothpick

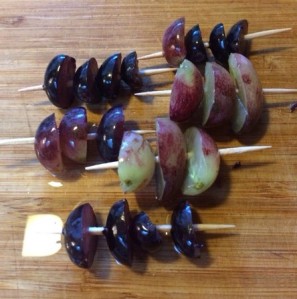
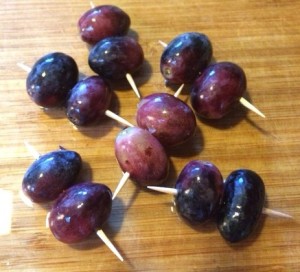
It sounds silly, but it is the simplest snack, and kids gobble them up! We made freshly squeezed lemonade in my son’s 2nd/3rd grade class today, and it was a simple customized mixture for each child that consisted of lemon juice, organic sugar, and water. But the crowd pleaser was the grape “ice cubes”! I washed the grapes the night before (this step helps create the icy outer layer), laced three grapes on each toothpick (slice grapes in half for children under age 3), then left them in the freezer overnight. I was barely able to leave the house with them because they were under attack by my children.

wpid-20141024123418.jpg

Frozen Halved Grapes on a Toothpick (for children ages 3 years and younger)

wpid-20141024123348.jpg

Frozen Whole Grapes on a Toothpick

Thank you, outdoor pool in Las Vegas, for the idea. They were just as fabulous to a crew of 18 moms in 100 degree weather as they were to a group of seven year olds.

Baked Goldfish Crackers!

I can’t begin to tell you how excited I am about this recipe. My kids love goldfish, and now I have a replacement! I heard about the inventor of this recipe, Chef Chloe Coscarelli, through a Marie TV episode. If you don’t know Marie Forleo of Marie TV, she is AMAZING. She is essentially an online business coach whose motto is “Marie TV: The place to be if you want to create a business and life you love.” Her videos are fantastic, inspiring, and motivating. If you have a job you don’t love, or you know you were meant for more than what you’re doing professionally, I highly suggest you start following her NOW. But back to Chef Chloe. She is the first vegan baker who has ever won the reality show Cupcake Wars, and she now has three cookbooks out. I checked out her website and was fascinated with her homemade vegan goldfish crackers. She even has a link to buy the little teeny tiny goldfish cookie cutter shape! I printed the recipe and tried it as soon as I got home. I promised myself that if they turned out tasty that I would invest in the cookie cutter. And guess what, they’re BOMB! Consider that order placed.

Although it does contain flour in her original recipe, I am proud to say that I was able to gluten-free-anize it! My super picky 4-year old said, “Mmmm, these are good!”

Baked Homemade Goldfish Crackers (gluten-free, egg-free, dairy-free, soy-free, nut-free, peanut-free, vegan)

Recipe adapted from Chef Chloe’s Vegan Goldfish Crackers

Ingredients:

  • 1 cup all-purpose flour, plus extra for work surface (for gluten-free, use 1/3 cup brown rice flour, 1/3 cup sorghum flour, and 1/3 cup potato starch or tapioca starch)
  • 2 tablespoons nutritional yeast (next time I may use even less because my 7-year old identified it immediately)
  • ¼ teaspoon onion powder
  • 1/8 teaspoon turmeric (for coloring)
  • 1 teaspoon sea salt
  • ½ teaspoon ground black pepper (optional, but recommended for adults)
  • 5 tablespoons vegan margarine (I used Earth Balance Organic Coconut Spread. It does not taste like coconut, and it is soy-free! Be sure to use directly from the refrigerator because it melts fast, you want to use it in its solid state for this recipe.)
  • 3 tablespoons cold water (I put water in a bowl and added ice cubes, waited a minute, then measured the water from the bowl to ensure it was cold)

Directions

1. Preheat the oven to 375 degrees, and line a baking sheet with parchment paper.

2. Add all of the dry ingredients to a food processor and process until well blended.

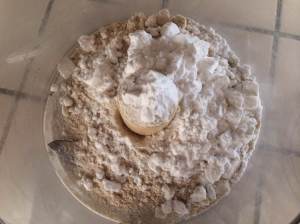
goldfish1

3. Add the margarine to the food processor, and pulse 15 times until beads of the flour/margarine mixture form.

4. Add the cold water to the food processor, and pulse until just combined.

5. Turn the dough out onto a lightly floured surface, and roll until it’s approximately 1/4″ thick.

goldfish2

6. Use small cookie cutters to press into the dough, then transfer to the baking sheet.

goldfish3

7.Bake for 12-15 minutes (a few minutes longer depending on the thickness and size of your crackers as they compare to the goldfish shape).

goldfish4I strongly advise storing some freshly baked ones for lunches the next day, or else they’ll all be gone as soon as they are done.

Apple Chips Two Ways: Crispy or Soft

It’s that time of year again where I begin allergy-free cooking in my son’s classroom! This year we have a few highly severe nut allergies who are sensitive to touch, so while I am well-versed in allergy-free cooking, it is extra stressful making sure I keep these children absolutely safe! Fortunately, I am confident that I can (1) create a fabulous allergy-free cooking program that the kids will learn from as it ties to the curriculum, (2) have fun as we create new foods, (3) teach them to enjoy healthy, nutritious, unprocessed snacks, and (4) keep all of the allergy-free kids perfectly safe!

The first cooking lesson began with Apple Chips. The students were learning about Now and Long Ago, so they compared what we do today to what we did 100 years ago. (Sidebar: Brody told his teacher that his grandma would be 101 years old on Halloween this year, and she asked if he could bring her in! I thought that was the cutest thing — taking my adorable grandma to Brody’s school, so kids could ask her about her age.)

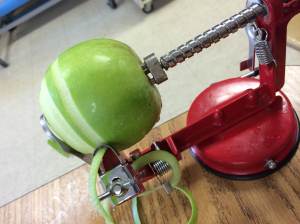
applecorerpeelerslicer

Apple Peeler/Corer/Slicer

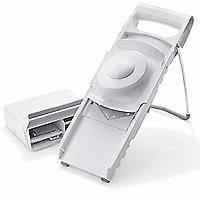
mandoline

Mandoline by Pampered Chef

I chose to make Apple Chips because I could show the students what an antique apple peeler/corer/slicer looked like, and we could use one in class. We also used a mandoline and apple corer and said that they also used them 100 years ago. Below are the modern-day tools we used in our classroom:We used the dehydrator to make the Apple Chips, so I could compare them to the way that fruit used to be sun-dried in order to preserve it. I also baked a batch in the oven for the sake of comparison. Each student had their own preference for dehydrated Apple Chips, which made them soft, or baked Apple Chips, which made them crunchy. Here are recipes for both.

applechips3

Watching the Apple Peeler/Corer/Slicer in action.

Apple Chips – Crispy & Crunchy (raw, vegan, gluten-free, egg-free, dairy-free, soy-free, tree nut-free, peanut-free)

Ingredients:

  • 2 ripe (but not soft) apples
  • optional: cinnamon

Tools:

  • Oven
  • Parchment paper or non-stick cooking spray
applechips2

Raw apples spread out on the sheet.

Directions:

1. Preheat the oven to 250 degrees

2. Slice the apples very thinly using a knife, mandoline, or apple peeler/corer/slicer. I prefer using a mandolin for the most uniformly sized slices.

3. Spray a baking sheet with non-stick spray, or cover it with parchment paper to prevent the apples from sticking.

4. Spread the apples out evenly on the baking sheet. Optional: Sprinkle with cinnamon.

5. Bake for 1 1/2 hours or until the apples reach your desired crunchiness.

Apple Chips – Soft & Chewy (raw, vegan, gluten-free, egg-free, dairy-free, soy-free, tree nut-free, peanut-free)

Ingredients:

    • 2 ripe (but not soft) apples

optional: cinnamon

Tools

  • Dehydrator

Directions:

1. Slice the apples very thinly using a knife, mandoline, or apple peeler/corer/slicer. I prefer using a mandolin for the most uniformly sized slices.

2. Spread the apples out evenly on a dehydrator sheet. Optional: Sprinkle with cinnamon.

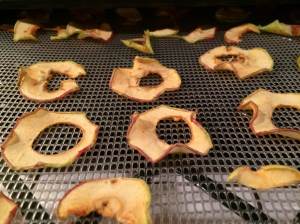
3. Dehydrate at 135 degrees for 15 hours or until the apples reach your desired texture.

applechips1

Dehydrated apples after 15 hours of low heat.

Next up: Teaching the students that every part of our food can be reused! Making homemade Apple Cider Vinegar with the left over cores and peels!